Bootable ISO to USB
Coming back from work, I picked up a marketing newsletter from a local IT/book store and noticed that a 4GB Imation Nano Pro USB flash drive was selling at just USD 10. At this price, I could use it to store custom built, bootable OS installation media. Since I will be heavily customizing the installation itself anyway, it would be a much practical solution than iteratively burning each installation image to a CD-RW disc. Also, for rack-based machines that don’t have DVD/CD drives built-in, booting off of a USB flash drive would indeed be more practical than booting off of an external DVD/CD drive.
There are many articles and forum discussing the many methods of making a bootable USB flash drive. However, I want to highlight a particularly useful piece of open source software that could help transfer a bootable ISO image to a USB flash drive painlessly. Well, almost painlessly. This software is called the Universal Netboot Installer, or UNetbootin (http://unetbootin.sourceforge.net/).
UNetbootin, as of this writing, is currently only available in flavours of Windows and Linux. I use a Mac and run Parallels Desktop. So, all I had to do was download the Windows version and run it in my virtual machine.
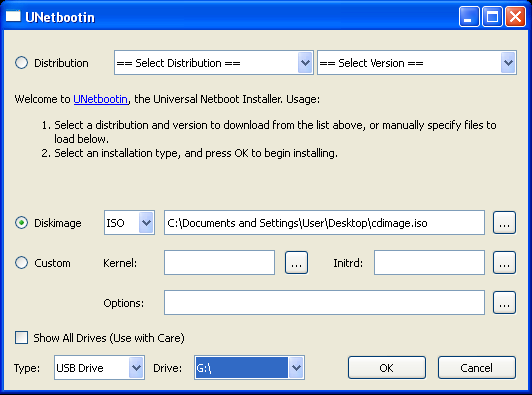
Before launching UNetbootin, make sure you have formatted the USB drive and plugged it in. Running UNetbootin, you will get the following screen:

UNetbootin in action on Windows
Everything in the main window is fairly straightforward, simple and clean; just the way I like it.
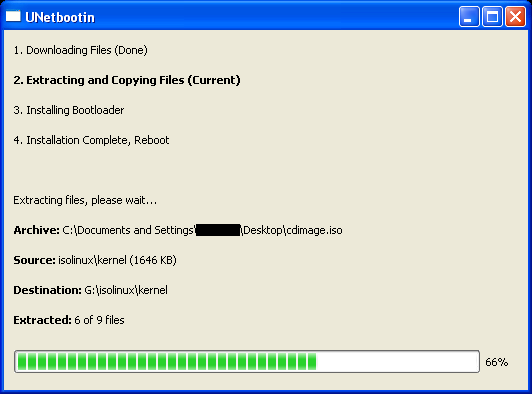
In this example, I had previously generated a bootable CD image as an ISO. My target USB flash drive is the G: drive. This drive is automatically detected; a nice feature to have for those of you who easily forget your alphabet and mistakenly target your main hard disk. Anyway, once you have these two options checked and double checked, click “OK” and it will do everything else for you.

UNetbootin doing its thang
After this is done, mount the drive (if not already mounted) and open the syslinux.cfg file in your favorite editor; especially if you are booting into a Linux system from the USB flash drive. This file should point to the right kernel to load during boot as the default option. If in doubt, you can still choose which kernel to boot from since UNetbootin also installs an interactive boot loader.
Notice that in the first screenshot, there is a “Distribution” option. Read all about it on UNetbootin’s website. It is useful for those of you who want to boot Linux distributions from a USB flash drive.
Also, make sure that you have enabled booting from USB in your target machine’s BIOS settings.
Have fun!
About this entry
You’re currently reading “Bootable ISO to USB,” an entry on Aika's Blog of Contraptions
- Published:
- January 7, 2009 / 9:21 PM
- Category:
- Works For Me
- Tags:
No comments yet
Jump to comment form | comment rss [?] | trackback uri [?]